Okay, so last Tuesday, I dragged my lazy butt out of bed at 5 AM because I wanted to snap some shots at Green Park Stadium without crowds messing up the view. Grabbed my entry-level DSLR – that old Canon Rebel thing – and the kit lens it came with. No fancy gear, swear. Hopped on the bus feeling half-dead.
Getting There & Scoping Spots
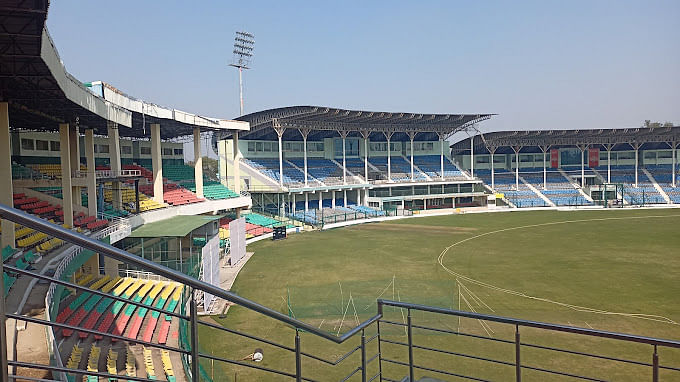
Sun was just peeking when I arrived. Security guy gave me the stink eye until I flashed my ticket. First thing? I walked the whole perimeter. Found three sweet angles: one dead-center facing the main stands, one low near the corner flag looking up, and this elevated walkway view behind the goals. Noticed how the morning light hit the east-side seats – pure gold.
Camera Setup Fumbling
My camera was on full-auto like usual. Took a test shot. Looked like sad grey porridge. So I switched to “Aperture Priority” mode (that’s the “Av” button for Canon noobs like me). Dialed it down to f/8 because some photography uncle on YouTube said it keeps stuff sharp front-to-back. ISO? Pumped it to 400 since clouds were being moody. Left the white balance on “Auto” because I forget how to change it.
- Big Mistake: Forgot my dang tripod. Resting elbows on a railing made my shots look drunk until I held my breath like a sniper.
- Happy Accident: Lens had dust spots? Nope – turned out birds flying past added cool little dots in the sky.
Actual Clicking
Made peace with the railing and started shooting. Held down the burst mode when those birds flew by. Framed the green pitch against the rusty stadium seats – that color clash popped way harder than I expected. Zoomed the kit lens all the way out to 18mm for wide shots, then cranked it to 55mm to pick out lonely seats with peeling paint. Didn’t overthink it; just kept moving till my knees complained.
How The Settings Saved My Bacon
That f/8 aperture thing? Magic. Grass blades stayed crispy while the stands faded nicely into the background. Bumping ISO saved me from shadow sludge. And burst mode caught a pigeon mid-crash-landing that’s now my phone wallpaper. Only tweaked brightness later on my phone – zero fancy editing.
What I’d Tell Past-Me
- Wear gloves. Metal railings at dawn feel like Arctic ice.
- Scout bathrooms first. Coffee goes through you fast.
- Beginners waste hours on settings. Set f/8, ISO 400, and SHOOT. Adjust if it looks like mud.
Left with 200 shots – maybe 7 keepers. But those 7? Chef’s kiss. Moral: Stop reading gear forums. Go click stuff.